
We love a simple, and inexpensive, board you can make using creativity and materials around your house. This play board is not only a great STEM activity, it’s also an awesome fine motor skills tool. Happy crafting!
Materials:
Poster Board
5 Jumbo Popsicle Sticks
Paint
Velcro
5 Pipe Cleaners (Different Colors)
Markers/Sharpie
4 Sheets of Tissue Paper
6 Mason Jar Lids (3 Small, 3 Large)
Yarn (3 colors)
Kabob Sticks
Whiteboard (Small Square)
Dry Erase Marker
Construction Paper
Hay String
4 Felt sheets
Shaving Cream
Sandwich Bag
Hot Glue
Directions:
Square 7. Draw a rectangle. Measure out the length of your kabob sticks with the length of the rectangle. Simply mark the length, and break each stick to the required length. Hot glue the sticks together tight in the rectangle shape. Label it “rectangle”.
Directions:
Using a ruler and a sharpie, section off the poster board according to each section.
Square 1. Paint 5 jumbo popsicle sticks white. Once dry, tape the sticks together and draw a lion using markers. Velcro each popsicle stick separately and placed them together on the board. 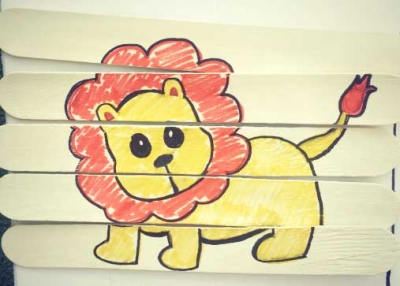
Lesson: This makes a puzzle for your little one to work on, helping with coordination and problem solving skills.
Square 2. Trace a diamond on the board. Individually hot glue the pipe cleaners row after row in the diamond. Label it a “diamond”.

Lesson: Teaches colors, the diamond shape, and soft touch from the pipe cleaners.
Square 3. Draw an oval on the board. Roll pieces of tissue paper into balls and hot glue them to fill the oval. Label it “oval”.
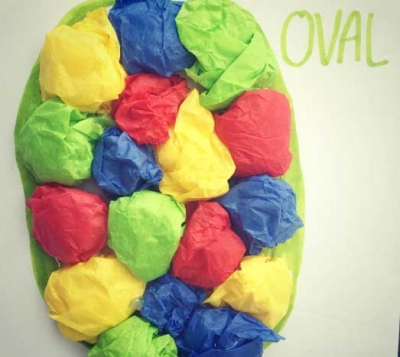
Lesson: This teaches colors, the oval shape, and the feel of paper from the tissue paper.
Square 4. Using different colors, paint the lids. Next, simply hot glue the colors to form the color circle. 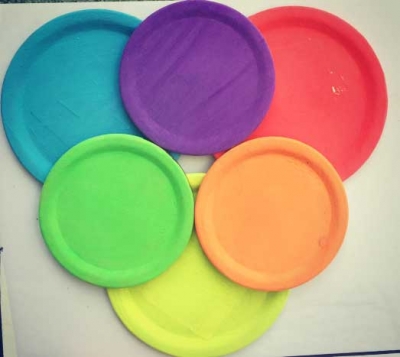
Lesson: Learn colors and mixing colors colors, primary colors for example.
Square 5. Draw a triangle. Hot glued a piece of yarn in the shape of a shoe lace. Leave room so the top is tieable. Label it “triangle".
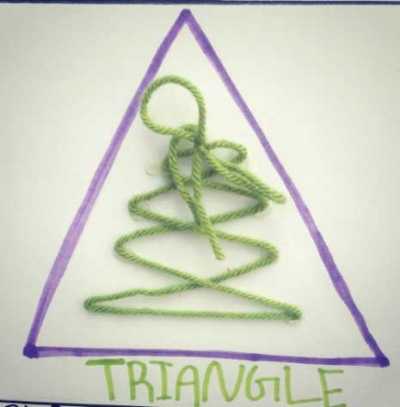
Lesson: This helps with colors, shapes and tying shoe laces.
Square 6. Draw a trapezoid. Make pompoms using yarn. Wrap a strand of yarn around two fingers, tie off the wrap, cut the yarn holding the wrap in place, cut the wrap. The yarn will flare out, making a pom pom. Hot glue the pompoms in the trapezoid. Label is “trapezoid”.
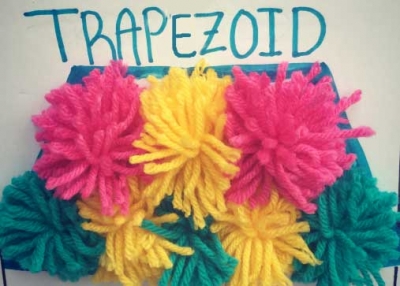
Lesson: This teaches color, soft touch and shapes.
Square 7. Draw a rectangle. Measure out the length of your kabob sticks with the length of the rectangle. Simply mark the length, and break each stick to the required length. Hot glue the sticks together tight in the rectangle shape. Label it “rectangle”.
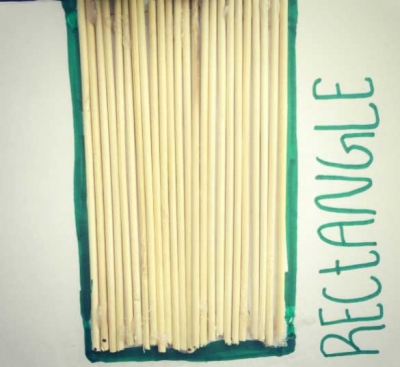
Lesson: This teaches shapes and texture of tough material.
Square 8. Glue a square white board onto the poster board.Velcro a marker to the top of the square so it’s interchangeable. Border it with construction paper using hot glue.
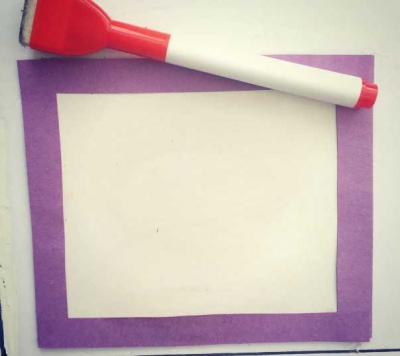
Lesson: This is a free drawing station for creativity or game space like tic tac toe, or give your child math problems to solve.
Square 9. Clocks! Draw a circle and color the numbers in marker. Pin 2 paper arrows to the center so they are movable.

Lesson: This is to help with colors and time.
Square 10. Draw a star. Wrap hay string into sections and hot glue them to fill in the shape of a star. Label is “star”.
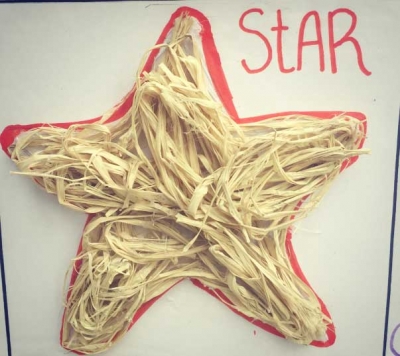
Lesson: This helps with color and shape and texture.
Square 11. Draw a circle. mermaid felt texture in the shape of a circle. Cut mini circles out of felt paper and hot glue each one to form a circle, making a mermaid pattern. Label it “circle”.
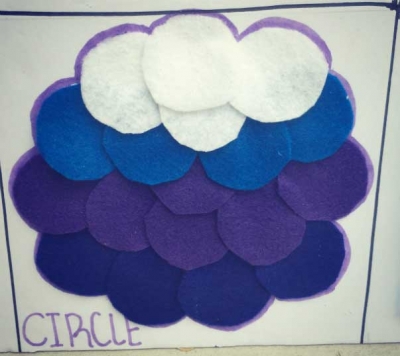
Lesson: This helps with color and shape and texture, but can also teach about mermaids.
Square 12. Hot glue a plastic baggie to the board. Fill it with shaving cream. Seal the bag.
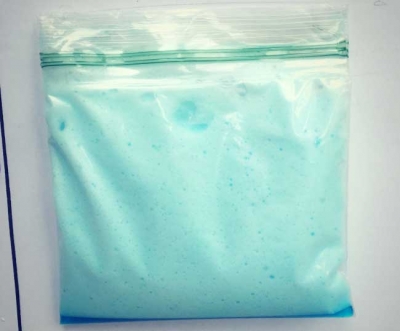
Lesson: This helps your little one with color, shape and mushy texture.
You're done! Science, technology, engineering, and math are so important to expose our kids to at an early age. Projects like this board are a perfect start! The result is an awesome and fun learning board filled with hours of play time and possible goal board for them to learn as they grow. Have fun with it!